


Convert Artwork to JEF Embroidery Format for Smooth Machine Embroidery
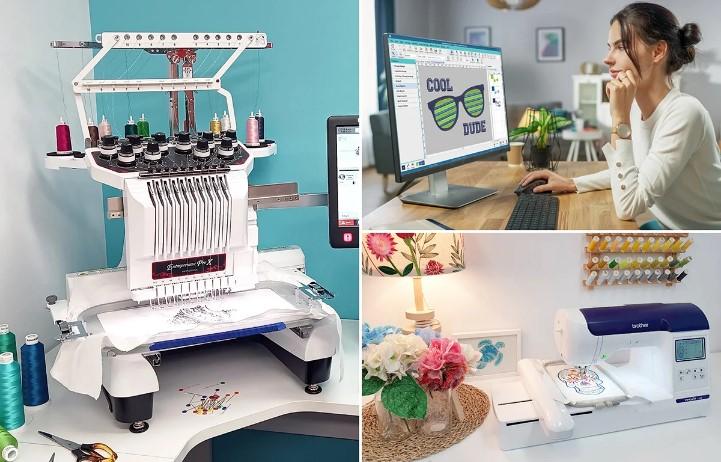
Embroidery machines need special files to create clean and accurate designs. If you only have a logo, drawing, or image, your machine cannot read it directly. It must first be converted into an embroidery file. For Janome embroidery machines, the JEF file format is one of the most popular options. A professionally created JEF file helps produce smooth stitching and reduces embroidery problems.
Experts Convert artwork to JEF embroidery format by manually creating stitch data instead of simply changing the file type. They study the design, select the right stitch types, adjust stitch density, and build clean stitch paths. This careful process creates machine-ready embroidery files that deliver accurate stitching and professional results.
In this guide, you will learn how artwork is converted into JEF embroidery files, why professional digitizing matters, and what steps help create beautiful embroidery that runs smoothly on Janome embroidery machines.
What Is a JEF Embroidery File?
A JEF file is an embroidery format used by Janome embroidery machines.
Unlike a normal image, a JEF file contains stitch instructions.
The file tells the embroidery machine:
-
Where to place each stitch
-
Which stitch type to use
-
Thread color sequence
-
Stitch direction
-
Stitch density
-
Design size
Without this information, the embroidery machine cannot stitch the design.
Why Artwork Cannot Be Used Directly
Many people believe they can load a JPG or PNG into an embroidery machine.
This is not possible.
Image files only contain pixels.
Embroidery machines need stitch commands.
Every artwork must first be digitized into an embroidery format.
What Is Embroidery Digitizing?
Embroidery digitizing is the process of converting artwork into stitch data.
It is not automatic artwork conversion.
Professional digitizers manually create every stitch.
They carefully decide:
-
Stitch order
-
Stitch angles
-
Underlay
-
Density
-
Pull compensation
Each setting improves embroidery quality.
Start with High-Quality Artwork
Good embroidery starts with a clear design.
High-quality artwork helps preserve important details.
The best artwork should be:
-
High resolution
-
Sharp
-
Easy to read
-
Clean
Poor-quality images create more digitizing challenges.
Preparing the Artwork
Professional digitizers prepare the artwork before digitizing.
This may include:
-
Removing unwanted backgrounds
-
Cleaning rough edges
-
Improving contrast
-
Sharpening outlines
Clean artwork produces better embroidery.
Choosing the Correct Stitch Types
Different parts of the design need different stitches.
Satin Stitch
Satin stitches work best for:
-
Text
-
Small shapes
-
Borders
They create a smooth and shiny finish.
Fill Stitch
Fill stitches are used for:
-
Large areas
-
Backgrounds
-
Wide objects
They provide solid coverage.
Running Stitch
Running stitches work well for:
-
Thin outlines
-
Fine details
-
Decorative elements
Using the correct stitch type improves the finished design.
Why Stitch Density Is Important
Stitch density controls how closely stitches are placed together.
Balanced density creates smooth embroidery.
Too much density may cause:
-
Thread breaks
-
Fabric puckering
-
Thick embroidery
Too little density may create:
-
Open spaces
-
Weak coverage
-
Uneven stitching
Professional digitizers carefully balance density for every design.
Underlay Supports the Embroidery
Underlay stitches are hidden beneath the top stitches.
They help:
-
Stabilize the fabric
-
Improve stitch quality
-
Support detailed embroidery
-
Reduce fabric movement
A good underlay creates stronger embroidery.
Pull Compensation Improves Accuracy
Fabric shifts during embroidery.
This movement changes the size of stitched objects.
Pull compensation slightly adjusts stitch placement.
This helps keep letters and shapes looking correct after stitching.
Stitch Direction Creates Better Texture
Stitch direction affects how embroidery looks.
Experienced digitizers carefully choose stitch angles.
Proper stitch direction creates:
-
Smooth curves
-
Better texture
-
Clean edges
-
More natural shading
Small changes improve the finished design.
Choosing Thread Colors
Professional digitizers match embroidery thread colors to the original artwork.
Good thread planning creates:
-
Smooth color transitions
-
Better contrast
-
Professional appearance
Correct color order also reduces unnecessary machine stops.
Testing the Embroidery File
Every professional embroidery file should be tested before delivery.
Testing checks:
-
Stitch quality
-
Thread sequence
-
Design accuracy
-
Machine performance
Any needed changes are made before the final file is sent.
Common Problems with Automatic Conversion
Automatic embroidery software often creates problems.
Poor Stitch Angles
Stitches may not follow the shape correctly.
Excessive Density
Too many stitches create thread breaks.
Rough Outlines
Design edges may appear uneven.
Missing Details
Small design elements may disappear.
Manual digitizing solves these problems.
Why Manual Digitizing Delivers Better Results
Professional digitizers understand how thread behaves on different fabrics.
They carefully adjust:
-
Density
-
Underlay
-
Stitch direction
-
Pull compensation
These adjustments improve both appearance and machine performance.
Best Fabrics for JEF Embroidery
Different materials require different embroidery settings.
Cotton
Cotton supports detailed embroidery very well.
Twill
Twill works well for uniforms and logos.
Canvas
Canvas provides strong support for embroidery.
Denim
Denim produces durable stitched designs.
Stretch fabrics usually need additional adjustments.
Common Uses for JEF Files
JEF embroidery files are used on many products.
Examples include:
-
Polo shirts
-
Hats
-
Jackets
-
Tote bags
-
Towels
-
Blankets
-
Uniforms
-
Promotional products
Professional digitizing improves quality on every item.
Choosing the Right Digitizing Company
A trusted embroidery company should provide:
-
Manual digitizing
-
Skilled professionals
-
Quality testing
-
Fast turnaround
-
Reliable customer support
Experience matters because every embroidery design is different.
Companies like Absolute Digitizing manually create JEF embroidery files that deliver clean stitches, accurate details, and reliable performance on Janome embroidery machines.
Tips for Better JEF Embroidery
Follow these simple tips before starting your project.
Use High-Resolution Artwork
Clear artwork produces cleaner embroidery.
Avoid Tiny Details
Very small elements may not stitch well.
Select the Correct Design Size
Larger designs preserve more detail.
Always Test the File
Sample stitching helps identify small adjustments.
Choose Experienced Digitizers
Professional skills improve every design.
Why Experience Makes the Difference
Embroidery digitizing is both a technical skill and an art.
Experienced digitizers understand:
-
Thread behavior
-
Fabric movement
-
Machine limits
-
Stitch balance
They know how to create embroidery that looks good and runs smoothly.
Professional companies such as Absolute Digitizing combine embroidery knowledge with careful manual digitizing to produce machine-ready JEF files that reduce production problems and create outstanding embroidery results.
Final Thoughts
Converting artwork into a JEF embroidery file requires much more than changing one file format into another. It involves careful planning, manual stitch creation, and a deep understanding of embroidery techniques. Every stitch, angle, and density setting plays an important role in creating smooth and professional embroidery.
Whether you are making company logos, custom apparel, promotional products, or personal gifts, investing in professional JEF embroidery digitizing helps you achieve better quality and more reliable machine performance. A properly digitized JEF file saves production time, reduces embroidery errors, and ensures every finished design looks clean, detailed, and professional.
